



Key Takeaway
Pour over coffee relies on four essential variables: a medium-coarse grind, a 1:16 coffee-to-water ratio, 195–205°F water, and a slow, steady pouring technique. By mastering these basics, you can transform your daily brew into a clean, bright, and nuanced cup. If your coffee tastes sour or bitter, simply adjust your grind size or pour speed to dial in the flavor.
Great pour over coffee comes down to four things you control: your grind, your water, your ratio, and your pour. Nail those, and pour over coffee brewing at home turns a decent bag of beans into a cup that tastes brighter, cleaner, and sweeter than anything from a drip machine. Miss one, and the same beans can taste sour, flat, or harsh.
This guide walks you through every part of the method, from picking a dripper to fixing a cup that came out wrong. It's long on purpose. Pour over rewards a little attention, and small changes make a big difference in the cup.
What pour over coffee is and why it's worth learning
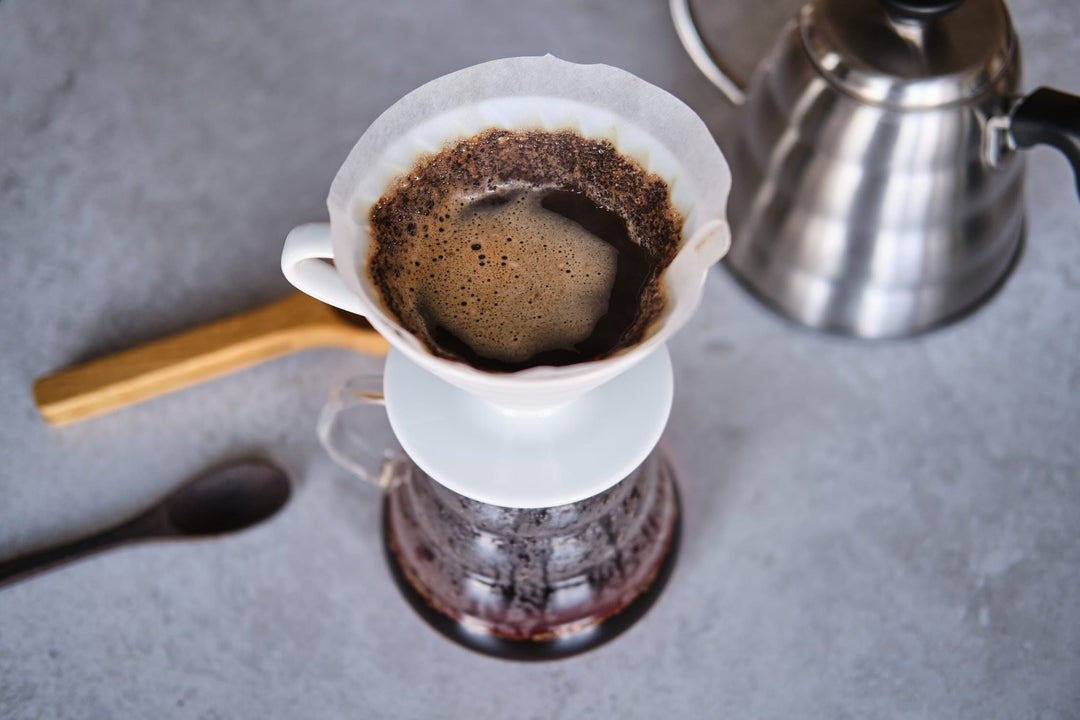
Pour over is a manual brewing method. You pour hot water over ground coffee in a filter, and gravity pulls the water through into your cup below. That's the whole idea. No machine, no pods, no guesswork built into a black box.
The appeal is control. You decide how hot the water is, how fast you pour, and how long the coffee sits in contact with the water. Each choice shapes the flavor. When you want to taste what a single-origin coffee really offers, this is the method that gets out of the way. The paper filter traps oils and fine grounds, which is why a good pour over tastes so clean.
It also costs very little to start. A dripper, some filters, and a way to heat water will get you brewing today. You can add gear later as you get pickier. And the ritual itself is calm. Five quiet minutes with a kettle is a nice way to start a morning.
Equipment you need for pour over coffee brewing
You need less than the internet suggests. Here's the short list, in order of how much it matters.
- A dripper. The cone that holds your filter and grounds. This is the heart of the setup.
- Paper filters. Sized to match your dripper. Buy the right shape or the fit will be wrong.
- A grinder. Grinding fresh matters more than most beginners expect. A burr grinder gives you even grounds, which is the whole game.
- A kettle. A gooseneck kettle gives you a thin, steady stream you can aim. A regular kettle works, it's just harder to pour slowly.
- A scale. Weighing your coffee and water is the fastest way to get consistent cups. Eyeballing scoops leads to a different brew every day.
If you're building a kit from scratch, a good digital scale changes everything. Weighing beats measuring by volume because coffee grounds settle and pack differently every time. A dedicated drip scale with a built-in timer lets you track your pour and your time at once, and there's more on why a scale matters if you want to learn more.
Choosing your pour over device
The dripper you pick shapes the cup more than any other piece of gear. The four common ones each brew a little differently. Here's how they compare.
|
Device |
Shape |
Cup character |
Best for |
|
Hario V60 |
Cone, single large hole, spiral ribs |
Bright, clean, layered |
Single-origin coffees, people who like control |
|
Chemex |
Cone, thick bonded filter |
Very clean, crisp, light-bodied |
Multiple cups, a hands-off pour |
|
Kalita Wave |
Flat bottom, three small holes |
Even, balanced, forgiving |
Beginners who want consistency |
|
Melitta |
Cone, small holes, restricted flow |
Fuller, slower, heavier |
A budget start, a richer cup |
The V60 is the one most home brewers land on, and it's where the site's step-by-step V60 brew guide can take you deeper. Its big hole and steep cone give you room to speed up or slow down your pour, which means you can steer the flavor. That freedom is also its catch: it will punish a sloppy pour. If you want a smaller learning curve, the flat-bottom Kalita spreads water more evenly and forgives an uneven hand.
The Chemex is a completely different setup. Its filter is thicker than most, so it strains out more oils and gives you the cleanest cup of the bunch. It also brews two to six cups at once, which the V60 struggles with. If you're often brewing for more than yourself, the 3-cup Chemex is a smart pick, and the dedicated Chemex brew guide covers its slightly different ratio.
The right coffee-to-water ratio
Start at 1:16. That means 1 gram of coffee for every 16 grams of water. It's a reliable middle ground that works for almost any coffee. For a single mug, that's about 22 grams of coffee to 350 grams of water.
Ratio is where taste gets personal. If your cup feels thin or watery, go stronger, toward 1:15. If it tastes heavy or muddy, go weaker, toward 1:17. Move in small steps and change one thing at a time. That's the only way to learn what your palate likes.
Here are a few common starting points to weigh out:
- One cup: 22g coffee, 350g water (1:16)
- Two cups: 30g coffee, 480g water (1:16)
- Stronger single cup: 23g coffee, 345g water (1:15)
Water weighs almost exactly 1 gram per milliliter, so you can read grams and milliliters as the same thing on your scale. Weigh your water; don't guess from a mug's size.
Water temperature and water quality
Aim for water between 195 and 205 degrees Fahrenheit. That's just off a boil. If you don't have a thermometer, boil your water, then let it rest for 30 to 45 seconds before you pour. Water that's too hot pulls out bitter, harsh flavors. Water that's too cool leaves the cup sour and underdeveloped.
Water quality gets ignored, and it shouldn't. Your cup is over 98 percent water, so the water is a real ingredient. Distilled or heavily softened water makes a flat, lifeless cup because the minerals that pull flavor out of coffee aren't there. Very hard tap water, on the other end, can mute the bright notes and leave scale in your kettle.
Filtered tap water is the sweet spot for most people. If your tap water tastes fine to drink, it'll usually brew fine too. If it tastes of chlorine or metal, a simple carbon filter pitcher fixes most of it. You don't need a lab, just water that tastes clean.
Grind size and why fresh grinding matters
Pour over wants a medium grind, roughly the texture of table salt or coarse sand. This is the setting most people get wrong, and it's the fastest fix for a bad cup.
Grind size controls how fast water flows through the bed of coffee. Grind too fine and the water gets stuck, over-extracts, and turns bitter. You'll also see the brew take far too long. Grind too coarse and the water rushes through, under-extracts, and tastes sour and weak. The brew will finish too fast.
Grinding right before you brew matters as much as the size. Coffee starts losing flavor within minutes of being ground, because the surface hits oxygen. Whole beans hold their aroma far longer. If you don't own a grinder yet, there are ways to grind without one in a pinch, though a burr grinder is worth the money once you're hooked.
How to brew pour over coffee step by step
Here's the full method for a single cup on a V60 or similar cone. Weigh everything and keep an eye on the clock.
- Boil your water and grind your coffee. Weigh out 22 grams of beans and grind to medium.
- Rinse the filter. Put the paper filter in the dripper and pour hot water through it into your cup. This washes away the papery taste and warms your gear. Dump that rinse water out.
- Add the grounds. Pour the coffee into the wet filter and give the dripper a gentle shake to level the bed. Put the whole thing on your scale and set it to zero.
- Bloom. Start your timer and pour about twice the coffee's weight in water, so around 44 grams, right over the grounds. Wait 30 to 45 seconds. You'll see the coffee puff up and bubble as it releases trapped gas. This is the bloom, and it sets up an even brew. There's a whole guide to the coffee bloom if you want to understand what's happening in that first pour.
- Pour in stages. After the bloom, pour slowly in a circle from the center outward, then back to the center. Keep the water level from getting too high. Add water in two or three pours until you hit 350 grams total.
- Let it draw down. Stop pouring and let the water finish passing through. Your total brew time, from the start of the bloom, should land between three and four minutes.
-
Serve. Lift out the dripper, swirl the cup, and drink it while it's hot.
Center pour versus spiral pour
How you pour water changes the cup. A steady spiral, moving from the center out to the edge and back, wets all the grounds evenly. This is the pour most guides teach because it gives you a balanced, even extraction. Keep the spiral gentle and avoid pouring straight onto the filter's edge, which lets water skip the coffee.
A center pour, where you keep the stream in the middle, digs a channel through the bed and pulls harder on the grounds in the center. It builds a slightly heavier, more intense cup. Some brewers use it late in the brew to boost body. For your first cups, stick with the spiral. Once you can do that reliably, play with center pours to see what changes.
Scaling up for more than one cup
Brewing for two or three people is mostly a matter of keeping your ratio and switching to a bigger device. A single-cone V60 gets crowded past two cups, because the water level climbs too high and the brew slows down. This is where a larger dripper or a Chemex earns its place.
Hold your ratio steady as you scale. For three cups on a 1:16 ratio, that's roughly 45 grams of coffee to 720 grams of water. Your brew time will stretch a little longer because there's more coffee to soak through, so aim for four to five minutes on bigger batches. Pour in more stages too, so you never flood the bed. Bigger brews are more forgiving of a small pour mistake, which is one reason batch pour over is a nice weekend habit.
Troubleshooting your pour over
Most bad cups trace back to one of a few causes. Here's how to read what your coffee is telling you.
- Tastes sour or sharp? You under-extracted. Grind finer, use hotter water, or slow your pour. Sour usually means water moved through too fast.
- Tastes bitter or harsh? You over-extracted. Grind coarser, cool your water slightly, or speed up your pour. Bitter means the water sat on the grounds too long.
- Brew finished too fast (under two minutes)? Your grind is too coarse, or you poured too aggressively. Tighten the grind.
- Brew stalled or clogged (over five minutes)? Your grind is too fine, or you have too many fine particles. Go coarser and pour more gently.
- Weak and watery? Not enough coffee for the water. Push toward 1:15, or check that you weighed the beans.
- Grounds stuck high on the filter walls? Your pour missed them. Swirl the dripper gently after your last pour to wash them back into the bed.
The pattern to remember: sour means speed it up and add heat, bitter means slow it down and cool it off. Grind is your biggest lever, so change that first. If your cup still tastes off after all that, the beans themselves might be the issue. Stale coffee can't be saved by good technique, which brings us to the beans.
Beans and freshness make or break the cup
You can dial in every variable and still get a dull cup from old coffee. Freshness is the ceiling on how good your brew can be. Coffee is at its best in the weeks after roasting, not the months.
Fresh coffee also brews better. That bloom in step four only puffs up strongly when the beans still hold their gas, which fades over time. A weak, flat bloom is often a sign the beans are past their prime. Buying whole beans from a roaster that dates its bags, then grinding at home, keeps you close to that peak.
Storage protects what freshness you have. Keep beans in an airtight container away from light, heat, and moisture. Skip the fridge and freezer for beans you're drinking within a few weeks, since temperature swings pull in moisture. There's a full breakdown on storing coffee properly that's worth a read if you buy in bulk.
For a coffee that shines through a pour over, reach for a bright, clean single origin. A medium-roast Colombia with notes of nectarine and brown sugar is a great place to start, since the method's clarity shows off exactly those kinds of delicate flavors.
Pour over versus other brew methods
While pour over is an excellent method, it isn't always the perfect choice. Recognizing when to use it makes all the difference.
When compared to drip machines, pour over delivers superior flavor and precision, though it falls short on convenience. An automatic machine handles the brewing while you get ready, whereas pour over demands five minutes of active effort. If you are in a rush, a drip machine serves a purpose, but you lose the meticulous control that lets single-origin beans truly excel.
The distinction between pour over and a French press comes down to body. By skipping a paper filter, the French press keeps oils and fine particles in the brew, creating a heavier, more robust texture. Pour over coffee brewing filters these elements out to deliver a much cleaner taste.
Neither approach is inherently superior; they simply offer contrasting textures rooted in the differences between immersion and drip brewing. Opt for pour over coffee brewing when you want crisp clarity, and reach for a press when you prefer a fuller body.
Frequently asked questions
What temperature should the water be for pour over coffee?
Pour over coffee brewing works best between 195 and 205 degrees Fahrenheit, which is just off a full boil. Without a thermometer, boil your water and let it rest 30 to 45 seconds before you pour. Too hot pulls out bitterness; too cool leaves the cup sour and thin.
What grind size is best for pour over?
A medium grind, about the texture of table salt or coarse sand. If your brew finishes in under two minutes, go finer. If it stalls past five minutes or tastes bitter, go coarser. Grind size is the single biggest factor you control.
Should I rinse my paper filter first?
Yes. Rinsing washes away the papery taste and warms your dripper and cup, which helps hold brew temperature steady. Pour hot water through the filter, then dump that rinse water before adding your grounds.
How long should a pour over take?
Three to four minutes total for a single cup, counting from the start of the bloom. Bigger batches run a little longer, up to five minutes. A brew that's much faster or slower is usually a grind problem before anything else.
Why does my pour over taste sour?
Sour means under-extraction, so the water passed through too fast to pull enough flavor. Fix it by grinding finer, using slightly hotter water, or pouring more slowly. Change one thing at a time so you know what worked.
Pour over coffee brewing rewards patience more than gear. Start with a clean setup, weigh your coffee and water, and pay attention to the clock and the taste. Once the method feels natural, the beans do the rest, so brew it with something fresh. The full brew guide library has ratio cards for every device if you want a quick reference by your kettle.



Leave a comment